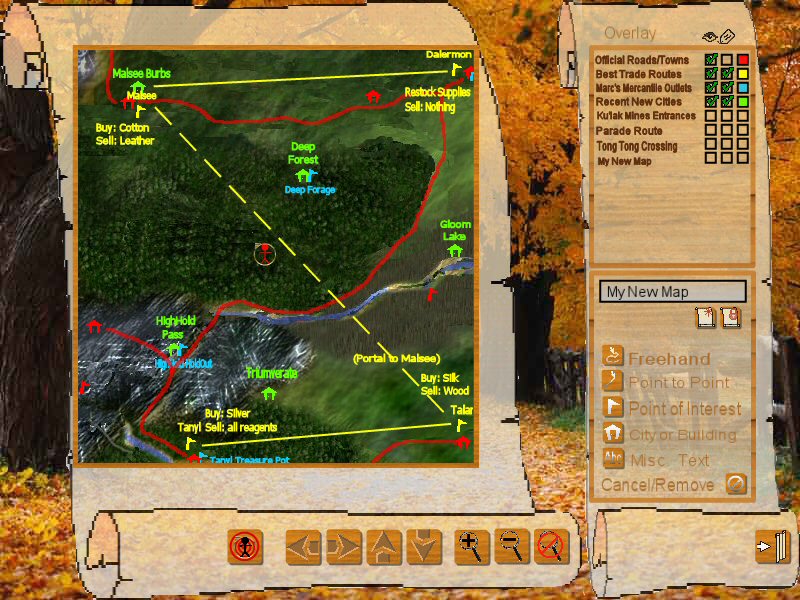
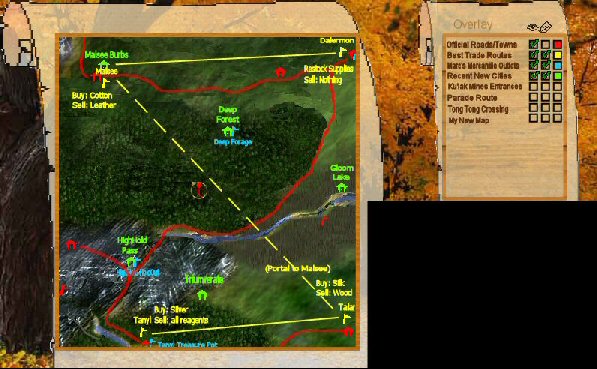
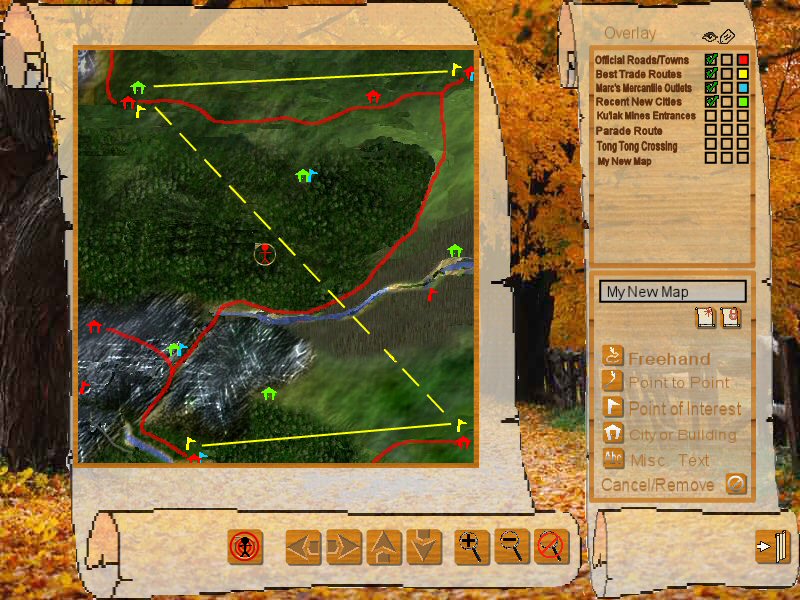
I created this prototype inteface to explain my concept of User Overlay Mapping. We aren't looking at the graphical choices or design, but rather the functionality and behavior of such a system. Some of the features aren't directly represented in the image, but I will discuss them in the detail sections below. First, here is the simulated screenshot.
Explaination:
I will divide the screenshot into functional sections and describe the use and behavior of those sections.
The Map
There will be a button or hot-key to open the map screen. It will bring up the section of the map interface shown above. It will remember the previous state of you map, including position, zoom level, and visible Overlays. While the map screen is up, you are limited in your movement. There is no jumping or running. You can turn, and you can walk slowly. Depending on how you define your keyboard layout, some of the Map functions may override other functions.
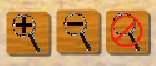
Zooming
These keys control the zoom. Zoom In, Zoom Out, and Standard Zoom. You'll be able to zoom all the way out to see the entire world in low detail, or zoom all the way in to see a specific grove of trees. Only fixed objects appear on the map. Geographic features, trees/forests, rivers. Permanent buildings and cities will also appear on the map. Players, Mobs, temporary structures, etc never show on the map other than the "You Are Here" icon. This is a simulation of a paper map that you can draw on. It's not a real-time updated GPS navigation system.
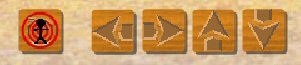
Positioning
These are the positioning keys. West/East/North/South. North is always up on the map. The "You Are Here" icon has an arrow showing you which direction you are facing. There's also a 'Center On Me' button to quickly bring the map back to where you are. It is a assumed that everyone has all the geographic information of world. However, to see details and location information, you need the overlays.
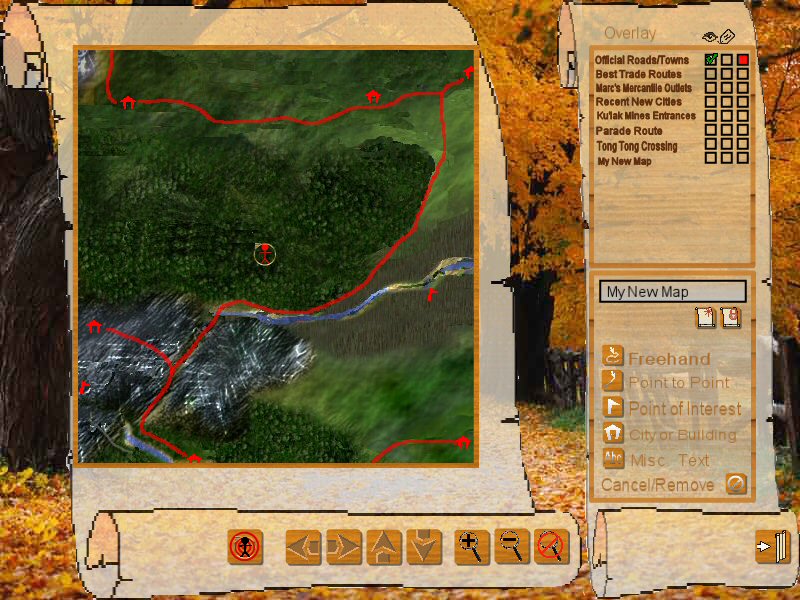
The Overlays
The overlays simulate drawing on the map. You add roads, locations, cities, buildings, information, whatever you want. Think of it as transparencies with an overhead projector. Different overlays would be made by different people to server different purposes. Some overlays would conflict with each other, while others would be made to be used in tandem. (If you look closely, you'll see that some of the information is written on-top of other information. When these overlays were created they didn't look to see if someone had already 'written' in this space. That is expected.)
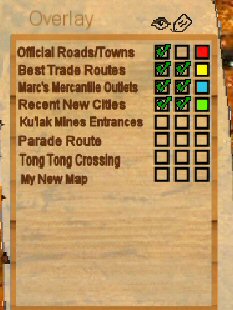
The Overlay Selection List
All overlays you have loaded will show up on this list. Putting a check in the column marked with the Eye makes it visible. Putting a check in the colum marked with the Tag turns on the Text Labels. The third column is what color the overal will show on your map. All overlays are in a single color, and that color can be changed at any time, it's not selected at the time of creation. You'll be able to choose your colors from a large list. You can also select the same color for multiple templates (if that suits your purposes.)
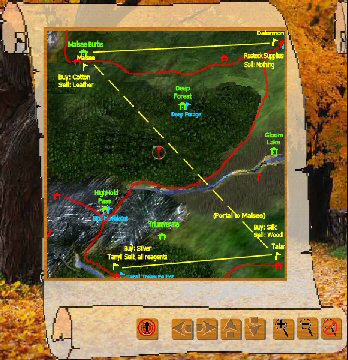
Here are four images showing how the view changes when selecting different options.
No overlays selected.
One overlay without labels
Overlays in Purple and Orange
Four overlays with no labels
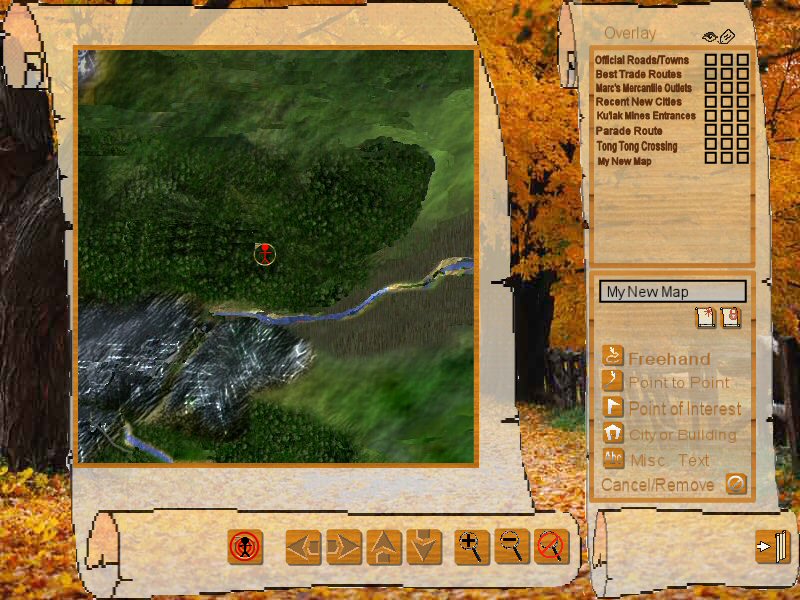
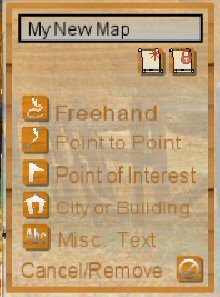
The Overlay Control Panel
Anyone can create an overlay. This would be a simple in-game process. The basic tools are shown here, but it is possible that more advance tools could be created.
Freehand: A tool for drawing lines. You use it just like a pencil and draw whatever shape you want.
Point to Point: A tool for drawing straight lines. You click on the end points, and a line is drawn between them.
Point of Interest: A basic marker. You position it, and assign a label.
City or Building: Similar to the Point of Interest marker, except this will show up as a building icon. It also asks for a label.
Miscellaneous Text: This allows you to write on the map, if you want to make more detailed notes about something.
Canel/Remove: If you want to erase something from the template you are editting.
At the top of the control panel is a text field for entering/changing the name of an Overlay. The two buttons beneath it are "New Overlay" and "Lock Overlay" (save the file). When you choose new overlay, you will have to enter a name, and then can begin drawing on the map. When you 'lock' the overlay, it shows up on the main Overlay list, and the changes saved. Any overlays in your list can be editted. I didn't show it on the screenshot, but there would be context menus (right click options) for the overlay list that allowed you to Edit, or Delete the overlay. If you choose "Edit" it moves it down to the lower panel, and you can make changes to it until you lock it again. "Delete" simply removes it from your list.
Exporting Overlays
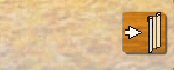
Once you have an overlay, you can give it to other people. There are two ways to accomplish this. The first is an in-game way. You simply select an overlay from the list, and click the "Export to Scroll" button. This will create a scroll object in your inventory that can be given or sold to someone else. If you have a scroll object for an overlay you don't already have installed, you simply 'USE' it, and it will be added to your list.
The second way is an out-of-game way. On your local computer, all overlays that you have will be stored in an 'Overlays' folder. Each one will be a separate file. Website operators can make these files available for download. If you find an overlay that you want, you simply download it, and put it in this folder. The next time you connect to the server, it will automatically be installed on your overlay list.
Conclusion
The greatest asset of a MMORPG is the players. A mapping system that only allows you to 'discover' the map that was designed by the developers ignores this asset. My mapping system was designed specifically allow players to contribute to the game, and share their information with others in a simple, but useful way. As with all ideas on this site, this is just a preliminary overview, and further refinement and detail would be added during an actual implementation.